| PAINTING CARPET CERAMIC FLOORING |
QUALITY SATISFACTION CERTAINTY GUARANTEED
HOME * ABOUT US * PAINTING * INTERIOR PAINTING * EXTERIOR PAINTING * CARPET * CERAMIC TILE * HARDWOOD FLOORS * LINKS AREA RUGS * CONTACT US * LAMINATE FLOORING * VINYL FLOORING * BAMBOO FLOORING * CORK FLOORING * CARPET TILES * GARAGE FLOOR PAINTING * EPOXY FLOORING
Custom Home Painting & Carpet
Interior Painting
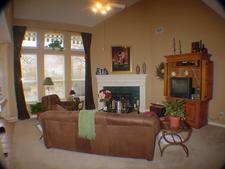

The five steps to a beautiful interior...
1. Setup
| Rooms and areas to be painted are scheduled with the customer. |
| Large furniture is moved into the center of the room. |
| Furniture is covered with plastic. Floors are covered with drop cloths. |
2. Prep
| Walls are scuff-sanded. |
| Holes and cracks in walls are filled. |
| Gaps in trim are caulked. |
| Stains, such as water marks, are sealed. |
| Washing is done where required. |
3. Painting
| Repaired areas are primed. |
| Paint is applied with a brush, roller or sprayer depending on the surface. |
| Ceiling and walls are painted to proper coverage and finish color. |
| Clean cut lines between trim & walls. |
| Only premium quality paints are used. |

4. Clean-up
| Furniture is moved back to original positions. |
| Floors and carpets are thoroughly vacuumed and swept. |
| All garbage is removed. |
| Touch-up paint is labeled and left with the customer. |
5. Inspection
| Before the crew packs up their equipment, a "wet walk-around" is done to ensure all contracted areas are painted properly. |
| Final touch-ups are noted on a 'punch list' & are completed before the crew leaves. |
The Customer Comment Card is completed by the customer.
Interior Repaint Details
Prep
This Interior Repaint Illustrated covers 4 pages figs 1-17, prep to finish
The room is in need of a lot of repair. There is a water stain, a knot, several size holes, joints and cracks

First step: Get a good idea of what you are getting into look around the room for the obvious Repairs: Water stains, large holes, cracks, and so forth. These are things that will absolutely need repair.
2nd :Optional prep: take a close look. Does the old paint appear to be bonded well? If large areas are pealing from a prior coat of paint, you will probably have to totally remove the pealing layer of the pealing section to prevent this from continuing.
Is there much debris in the previous paint that should be sanded out, are there runs sags heavy brush marks that could require a lot of sanding to remove? Look at woodwork for chipped corners and dents, do you want to take the time to fill them? Are there lead hazards? These are things that could require a lot of extra work and create dust.
3rd General prep: Caulking joints filling nail & pinholes, sealing knots, washing surfaces, removing mildew, and dulling surfaces. These jobs are pretty much standard routine.
Getting Materials
Once you assessed your situation you can make a list of the materials you will be using. Having most of the materials on site before you start saves time from having to leave off to go to the hardware store.
Most Common Materials: 120 and 220 grit Sandpaper, latex caulk, spackling compound, masking tape, rags.
Other items to consider: Wood dough, joint compound, joint tape, stick on wall patch, disposable plastic drop cloths, masking paper, stain sealer, paint thinner, detergent, de-glosser, denatured alcohol tack cloth, paint strainers.
Tools: Drop cloths, step ladder paint brushes, buckets, roller covers, roller handles, roller pan, pan liners, extension poll, putty knife, dust brush, caulk gun, nail set, hammer, utility knife, wire to poke caulk tube, screw driver, sponge work light.
Other tools to consider: Joint knifes, poll sander
Personal Items: Goggles, work gloves, rubber gloves, hat, dust mask, respirator.
Beginning The Work

Cover the floor with drop cloths. Any washing you have decided can be done at this point. (See
Remove electrical wall plates (use caution), and cover outlets and switches with tape.
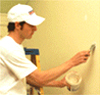
Next start the major wallboard repairs you will be doing: patch holes in wallboard, the larger repairs usually take several coats of joint compound, and you must allow dry time between each coat. Nail holes in wallboard can also be filled with joint compound.
(See about patching)
A stick on wall patch is placed over the hole of the windowed wall.
Then a coat of joint compound is applied
Other areas like the stick-on patch may also be compounded at this time
Allow compound to dry
The stick on wall patch is also coated with compound. It will need 2-3 coats of compound
The crack by the window is opened slightly with the pointed end of a bottle opener and coated with joint compound. it will need 1 or 2 coats of joint compound.
Lightly sand any high ridges between coats

Use a hand-sander for wall patches. Sanding screen is also available for sanding joint compound.
It is sometimes possible to use a wet sponge instead of sandpaper but some people find it more difficult to get good results this way
Woodwork patches are also sanded with120 grit
Caulk need not be sanded.

Use oil base or alcohol based primer-sealer for the water stains and the ink or crayon.
Use alcohol based primer-sealer for knots.
Check old paint for any debris you wish to sand out
Dust out or vacuum room
Apply second coat ceiling paint if desired when dry
Optional Prime entire ceiling with latex primer or primer sealer ( use oil primer if necessary) follow with 1 coat of ceiling paint.

All patches and filled spots are primed with a coat of latex or alkyd primer sealer Use alkyd sealer on areas that will be painted with oil/alkyd finish paint.
Alcohol primer sealer may be used as an option
When the primer is completely dry check to see if there are any rough spots that need to be sanded.
For optimum results: Instead of spot priming the patches as in Fig 13 and 14, prime the entire wall surface with the primer-sealer, and follow with 1 or 2 coats finish paint if needed.
When the trim paint is dry begin finish paint on walls .1st cut in 1 wall with an angular sash brush
Or
Wait until the trim paint is dry and give it a second coat .Then paint the walls as described above
When dry decide if woodwork and /or walls needs another coat. If so apply the second coat in that order
A 3/8" nap roller cover is usually preferred for walls
Do not apply paint thickly at the lower part of the baseboard and try to cut in as well as possible, because it is quit likely the paint will leak through at the edges of the masking tape if you are not careful . Allow paint to set up and carefully remove tape
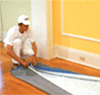
If you prefer not to use tape you may want to try a carpet shield.
When al the paint is dry. Take out painting items and pull up drop cloths
Install door knobs, wall plates, window locks and vacuum the floor.
Then you can hang curtains and move furniture back in
Finished !
Nail holes and dents are filled.
Use spackling compound or wood. filler on the wood work. Use joint compound or spackling compound on the walls and ceilings.
Caulk the joints and the cracks in the corners with latex caulk.
Scrape any areas of loose paint, sand debris from prior coats of paint. If the prior paint is in very good condition the fine 220 paper can be used, but most often a coarser paper is needed for this purpose.
Seal stains and knots .Oil based stain sealers will work on most stains but the alcohol-based sealer should be used on knots.
Glossy surfaces can now be dulled by sanding with 180 or 220 grit sandpaper.
Fill holes in woodwork with spackling, wood dough, or other preferred wood filler using a putty knife. Nail holes in wallboard may be filled with spackling.
Caulk joints at door and window casings baseboards and other painted woodwork use an acrylic latex caulk. Caulking can often repair cracks at corners of walls and ceilings.
When the fillers (joint compound, spackling, wood dough) have dried sand any build up of filler flush with surface. Spot prime filled areas and bare wood with the sealer or other appropriate primer. Note if you will be priming an entire area spot priming is not necessary.
Surfaces Priming
Any patched or bare surfaces will need to be spot primed. Now prime any areas such as the ceiling or walls that will get a full coat of primer. This step is optional and usually does not have to be done on previously painted surfaces ,but can often give the best results especially on discolored or splotchy ceilings..
Final Prep Steps
Check the primer to see if it needs any sanding to do before the first coat of finish paint is applied, hopefully there will be very little to do at this point. Check around the room for places that might have gotten missed during the prep stages. Seal any stains. If you decide to fill any holes, keep in mind that they should be spot primed before painting.Clean the room. If you have not had allot of repairs to do, then you may be about ready to start painting .If you have created allot of dust try to eliminate the dust as much as possible.
Dust A common method of clearing dust out cloth drop cloths has been to take them out and shake them. But you must know there are no lead paint issues and you feel you have an appropriate area to do so away from play areas, pet areas, and bird feeders ect. Other wise it is probably better to wash them. Plastic tarps can sometimes be swept with a broom. Disposable drop cloths can disposed of.
Finish
Make sure every thing is that could get spattered is covered. 
Check for anything that may not have been covered for paint spatters. Wipe up any spatters with a damp rag or sponge.
Allow the ceiling time to dry to see if it needs another coat. Often it will not look satisfactory until at least several hours of dry time. Work on something else for a while.
If recoating, allow sufficient between recoats. Check can label for recoat time.
Tip For ceiling divided into sections by beams or moldings, paint one complete section at a time.
Tip Cutting in textured ceilings can be difficult. Allowing some of the ceiling paint to get on the wall while cutting in, and then cutting in with the wall paint after is easier. Or try masking tape on wall. Experiment with one wall and remove tape immediately.
Trim: The wood work is often the most time consuming part of an interior paint job It is usually easier as far as the "cutting in ", if the woodwork (except for baseboards) is painted before the walls are painted. This way it will usually be ok if you get narrow light strip of the trim paint on the walls as long as this paint will cover with the wall paint when cutting in with wall paint.


For doors; Remove or tape around the doorknob. Decide if you think it will be easier to paint the door or the casing first. You will have to be changing the position the door at least several times while painting.
Tip Keep a wedge-shaped doorstop handy to hold the door in a preferred position.
Tip For fine finishes use a tack-cloth to remove any remaining dust just prior to painting.

Remove wall plates. Cut in an entire wall use a 2 inch or 2.5 inch angular sash brush. Paint a strip about 3 inches wide next to the ceiling, around door and window casings, at the wall corners ,and next to the baseboards. Then roll the wall .We suggest using a 9 inch roller, an extension poll and a roller pan. Start rolling at the top corner of one wall, overlapping your cut in paint as you go and work your way down so as to paint a vertical strip from top to bottom. Make the about 2 feet wide.. Then roll another 2 foot strip from top to bottom overlapping the first strip an inch or so. Continue until the wall is finished. Next cut in and roll the next wall .Continue until all walls in the room are completed.
Allow the walls adequate time to dry. Decide weather or not the walls need another coat. If so ; recoat the walls next and paint the baseboards later.
If not ; move on to paint the baseboards next

When using masking tape as a cut in guide do not put paint on thickly against the tape edge, as it may leak. Painters sometimes refer to this as dry brushing . Try a section, then pull off the tape to make sure you are getting no leaks. If you get leaks clean the wet paint immediately.
It may be safer to cut in to the floor as good as possible ,even when using masking tape, but if the paint is going on to thick it could still leak through the masking tape
Finish all base boards then carefully pull up masking tape.
Free In Home Estimates - 972-596-9985 - Email Us

Custom Home Painting & Carpet Service Cities:
Dallas · Richardson · Plano · Austin · Allen · McKinney · Frisco · Flower Mound · Coppell · Highland Village
Lewisville · Carrollton · Farmers Branch · The Colony · Garland · Sasche · Rowlett · Rockwall · Wylie
Forney · Heath · Sunnyvale · Mesquite · Fort Worth · Arlington · Irving · Grapevine · Grand Prairie
Southlake · Hurst · Euless · Bedford · Bee Cave · Cedar Park · Dripping Springs · Leander
Georgetown· Lakeway · Pflugerville · Round Rock · West Lake Hills · Bastrop · San Antonio
Custom Home Painting & Carpet specializes in these Neighborhoods:
Forest Creek Estates · Hunter’s Glen · Watters Crossing · Deerfield · J. J Pearce · Fairways of Ridgeview
Stonebridge Ranch · Russell Creek Estates · Yale Park · Twin Creek · Prestonwood Hills · Glen Heather
Harrington Homeplace · Pittman Creek Estates · Ranch Estates · Whiffletree · Wentworth Estates
Fairways of Ridgeview · Willow Bend Estates · Preston Meadow · Highlands of Preston Ridge
Stonehaven Estates · Plano Trails · Chase Oaks · Carriage Hills · Hills of Indian Creek · Dallas North Estates